Power Automate, a powerful tool in the Microsoft Power Platform, enables users to automate workflows between their favorite applications. Integrating Power Automate with Jira, a popular issue-tracking and project management tool, can streamline ticket creation directly from your business processes. In this blog, we’ll walk through how to automatically create a Jira ticket using Power Automate.
Prerequisites
Before we dive into creating a Jira ticket using Power Automate, you’ll need the following:
- Access to Jira: Ensure you have a Jira account with appropriate permissions to create tickets.
- Power Automate account: You should have access to Power Automate, part of the Microsoft 365 ecosystem.
Jira API Token: For authentication with Jira.
Generate a Jira API Token
To connect Power Automate with Jira, you’ll need an API token to authenticate with Jira’s API. Follow these steps:
- Log in to Jira.
- Go to Account Settings.
- Under Security Settings, find the API Token section and click Create API Token.
- Give your token a label (e.g., “Power Automate Integration”).
Copy the generated token and save it securely.

Create a Power Automate Flow
Next, create a flow in Power Automate that pulls data from an RSS feed and adds it to your SharePoint list.
1 Go to Power Automate and log in using your Microsoft 365 account.
2 On the homepage, click on Create and choose Automated Cloud Flow.
Name your flow (e.g., “Create Jira Ticket”).
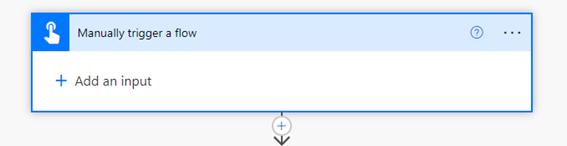
Choose a trigger for your flow, “Manually Trigger Flow”
3 Configure the HTTP Action to Create a Jira Ticket In the flow editor, click + New step then Search for HTTP
and select HTTP – Premium.
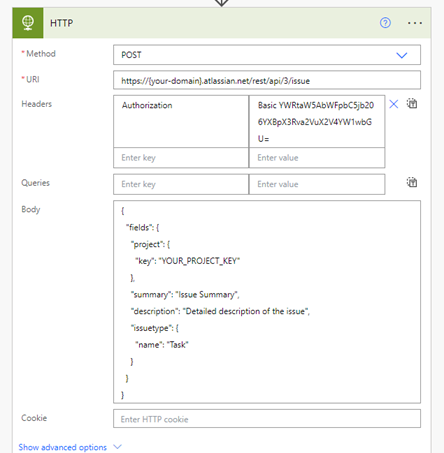
4 Configure the HTTP Request:
Set the method to POST (since you are creating a ticket).
Use the following URL for the Jira API endpoint to create an issue:
https://{your-domain}.atlassian.net/rest/api/3/issue
5 In the Headers section, add the following key-values:
Authorization: Basic <base64-encoded-email:API-token>
Content-Type: application/json
The authorization header must be generated using your Jira email and API token. Convert the string email:API-token to Base64 using any online encoder (e.g., Base64 Encode).
Example:
Authorization: Basic YWRtaW5AbWFpbC5jb206YXBpX3Rva2VuX2V4YW1wbGU=
Content-Type: application/json
The authorization header must be generated using your Jira email and API token. Convert the string email:API-token to Base64 using any online encoder (e.g., Base64 Encode).
Example:
Authorization: Basic YWRtaW5AbWFpbC5jb206YXBpX3Rva2VuX2V4YW1wbGU=
6. Add Body content:
{ “fields”:
{“project”: {“key”: “YOUR_PROJECT_KEY”},
“summary”: “Issue Summary”,
“description”: “Detailed description of the issue”,
“issuetype”: {“name”: “Task”}
}
}
Replace “YOUR_PROJECT_KEY” with your Jira project key, which can be found in your Jira dashboard.
Set the “summary” and “description” fields dynamically based on your trigger (e.g., email subject or form content).
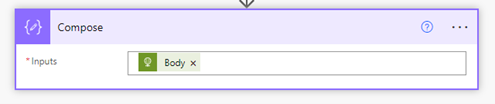
7. Add compose and add body response of HTTP Trigger then click Save and then test the flow by performing the action that triggers it
Conclusion:
By integrating Jira with Power Automate, you can automate the ticket creation process and significantly enhance your workflow. Whether it’s based on incoming emails, submitted forms, or other business triggers, you now have the power to streamline Jira ticket management using Power Automate.
With just a few configurations and the Jira API, you can create a seamless connection between Microsoft 365 apps and Jira, saving time and reducing manual effort.