Structure of Content
- Linking APN with FCM
- Setup Created Provisioning Profile in Xcode
- Configuring Push Notification & Background Mode within Xcode
- Setup Project into Firebase Console
- Remote Notification
- Local Notification
Linking APN with FCM
- Registering a key (p8 key)
- A key can be created that allows full access to the FCM through the Apple Push Notification service (APNs).
- On the “Keys” menu item, register a new key. The key’s name can be anything, but it’s important to ensure that the APN service is enabled.
- Registering an App Identifier
- To ensure messaging works during the production build of your app, you must create a new app Identifier that is linked to the application you’re developing.
- Click on the ‘Identifiers’ menu item and choose ‘App IDs’ to register an app identifier.
- Enter a description for the identifier.
- Enter the “Bundle ID” copied from Xcode.
- Scroll down and enable the “Push Notifications” capability (along with any others your app uses) and save the identifier.
- Generating a provisioning profile
- A provisioning profile enables signed communicate between Apple and your application. The signing of a certificate is necessary to ensure that the app installed on a device is genuine and has the correct permissions, since messaging is only applicable on real devices.
- Select the ‘New Profile’ option from the ‘Profiles’ menu item, ensure that the ‘iOS App Development’ checkbox is checked, and then proceed.
- Select your App Identifier already created and Click “Continue”. On the next screen you will be presented with the Certificates on your Apple account. Select the user certificates that you wish to assign this provisioning profile too.
- The created provisioning profile can now be used when building your application (in both debug and release mode) onto a real device (using Xcode).
Setup Created Provisioning Profile in Xcode
- Open your project in Xcode.
- In Xcode go into settings, link your apple account if not linked.
- Select your project target and select the “Signing & Capabilities” tab.
- Xcode can automatically sync the profile created above if “Automatically manage signing” is enable into “Signing & Capabilities” tab. Otherwise, you must manually add the profile from the Apple Developer console.
Configuring Push Notification & Background Mode within Xcode
- Select your project.
- Select the project target.
- Select the “Signing & Capabilities” tab.

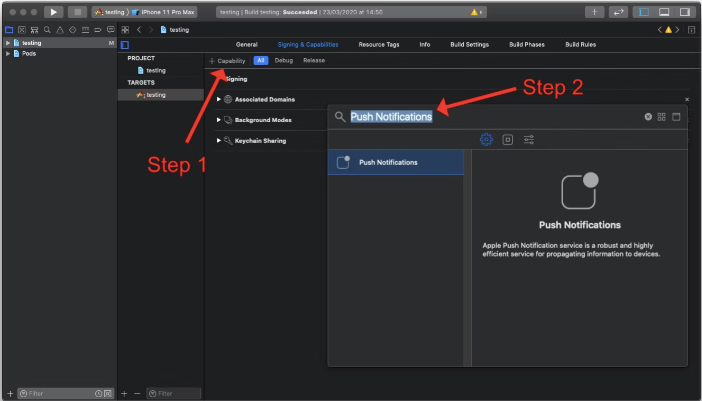
- Enable Push Notification
- Click on the “+ Capabilities” button.
- Search for “Push Notifications”.
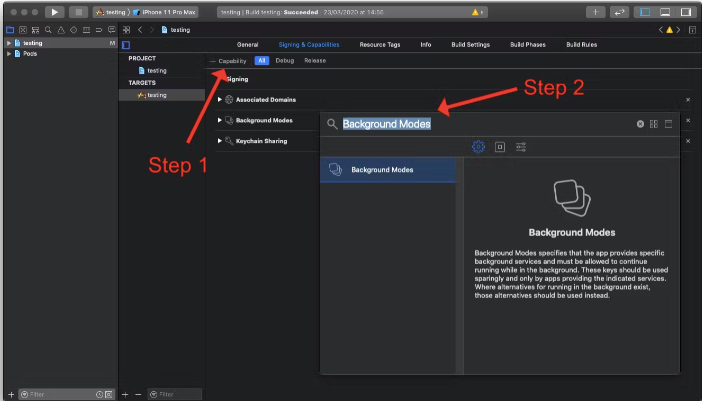
- Enable Background Modes
- Click on the “+ Capabilities” button
- Search for “Background Modes”.
- Ensure that both the “Background fetch” and the “Remote notifications” sub-modes are enabled.

Setup Project into firebase console
- Firebase console account must require
- Create a project
- Add iOS app into created project, now open your project in Xcode and go to General/Identify find Bundle Identifier, now use same Bundle Identifier, once app is added make sure download the GoogleService-Info.plist file and ensure the ‘Copy items if needed’ checkbox is enabled.
- Go to the “Project settings” and select the “Cloud Messaging” tab. Select your iOS application under the “iOS app configuration” heading and upload the downloaded register p8 key file and enter the Key ID
Remote Notification
1. Installation of remote notification module
- Using NPM command
- npm install –save @react-native-firebase/app
- npm install –save @react-native-firebase/messaging
- Using YARN command
- yarn add @react-native-firebase/app
- yarn add @react-native-firebase/messaging
2. Configuration on native iOS
- Configure Firebase with iOS credentials
- Open ios/{projectName}/AppDelegate.mm file.
- At the top of file, import the Firebase SDK right after “#import AppDelegate.h” line.
- Open ios/{projectName}/AppDelegate.mm file.
#import <Firebase.h>- Find didFinishLaunchingWithOptions method, add following line to the top of the method:
[FIRApp configure];- Open ios/pod file.
- add this line inside your targets right before the use_react_native line.
use_frameworks! :linkage => :static
- To use static Frameworks on iOS, you also need to manually enable this for the project with the following global to your /ios/podfile file.

- Permission setup
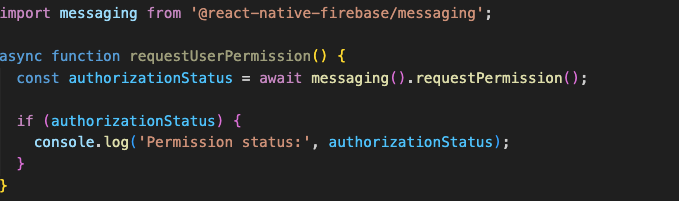
- Check the current permission status
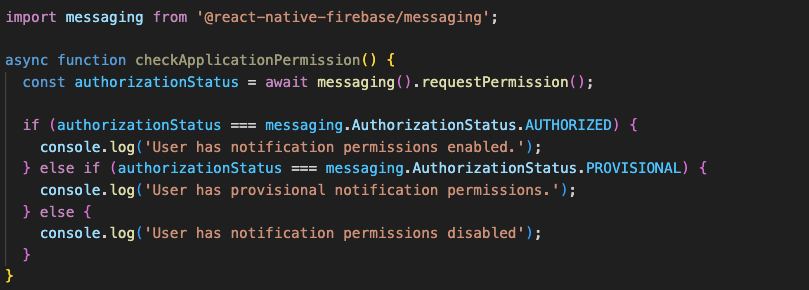
- Requesting permissions if it is not granted or not requested
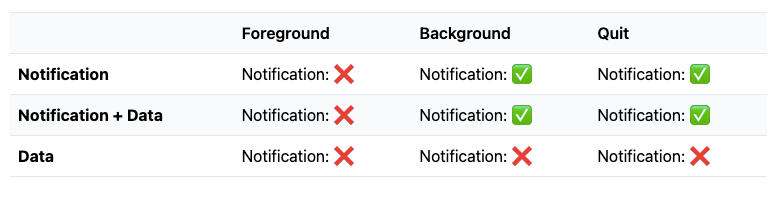
- Handle Notifications
- Notifications will be received in 3 app state are Quit, Background and Foreground.
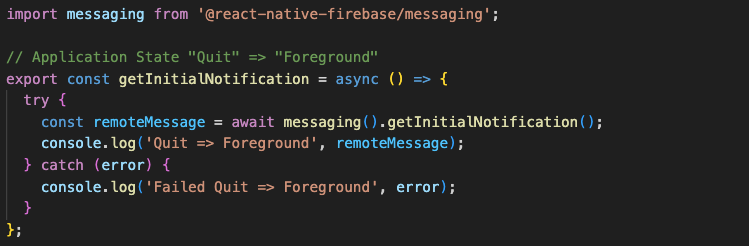
- Quit state: if app in Quit state and tap on notification, getInitialNotification() method will be triggered with notification data.
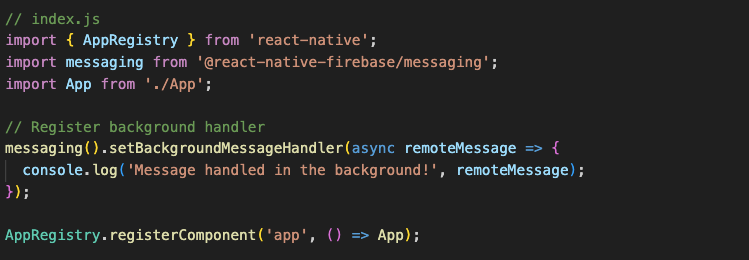
- Background state
- To setup a background handler, call the setBackgroundMessageHandler() outside of your application logic as early as possible.
- if app in Background state and tap on notification, onNotificationOpenedApp() method will be triggered with notification data.

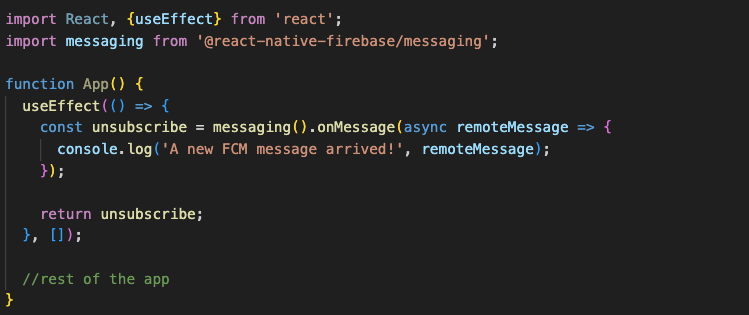
- Foreground state
- if app in Foreground state and tap on notification, onMessage() method will be triggered with notification data
- we can create a local notification using notification data received into onMessage() method listener.
Local Notification
- Installation of local notification module
- Using NPM command
- npm install –save @notifee/react-native
- Using YARN command
- yarn add @notifee/react-native
- Using NPM command
- Create local notification
Check out the local notification configuration file for iOS
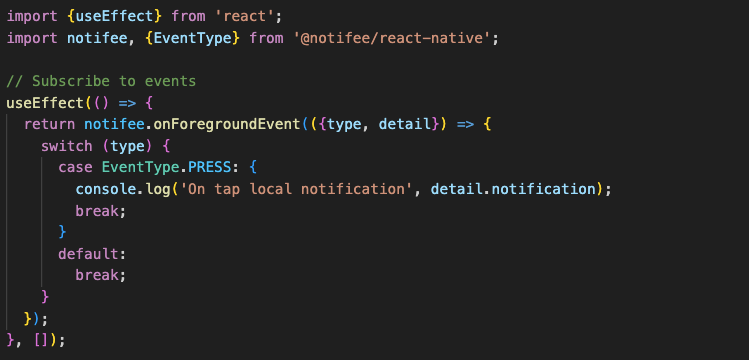
- Handle local notification
Learn More