Introduction to Plugin Development in Flutter:
In Flutter, plugins act as connections between the Flutter framework and platform-specific code. They let developers tap into native features and functionalities that aren’t directly accessible through Flutter. Plugins empower developers to enhance Flutter apps by smoothly integrating platform-specific capabilities.
Why Plugins Matter for Platform-Specific Features:
- Flutter is great for making apps that run smoothly on iOS, Android, and more. But sometimes, developers need to use special features that are unique to each platform. That’s where plugins come in.
- Plugins help developers bring platform-specific features into their Flutter apps. Whether it’s using sensors on a device, adding native-looking buttons, or connecting to platform-specific services, plugins make it possible without making Flutter development harder.
Creating custom plugins in Flutter offers developers several key benefits:
- Tailoring apps: Custom plugins enable developers to meet specific app requirements beyond Flutter’s standard features
- Expanding capabilities: By crafting custom plugins, developers can tap into the full potential of the underlying platform, enriching their Flutter apps with native functionalities.
- Reusable solutions: Custom plugins facilitate code reuse across projects, saving time and effort in development.
- Community contribution: Developers can share their custom plugins with the broader Flutter community, fostering growth and enriching the ecosystem.
- Skill enhancement: Crafting custom plugins enhances developers’ understanding of native platform development, nurturing cross-platform expertise.
- Versatile solutions: With custom plugins, developers can tackle a wider range of app development challenges effectively, leveraging both Flutter and native platform capabilities.
Let’s review the example:
We’re going to create a colour picker plugin and understand each step involved in the process.
To create a plugin in Flutter, you can use the following command:
flutter create --template=plugin <plugin_name> Replace <plugin_name> with the desired name for your plugin.
This command sets up a new Flutter plugin project with the necessary directory structure and files to get started.
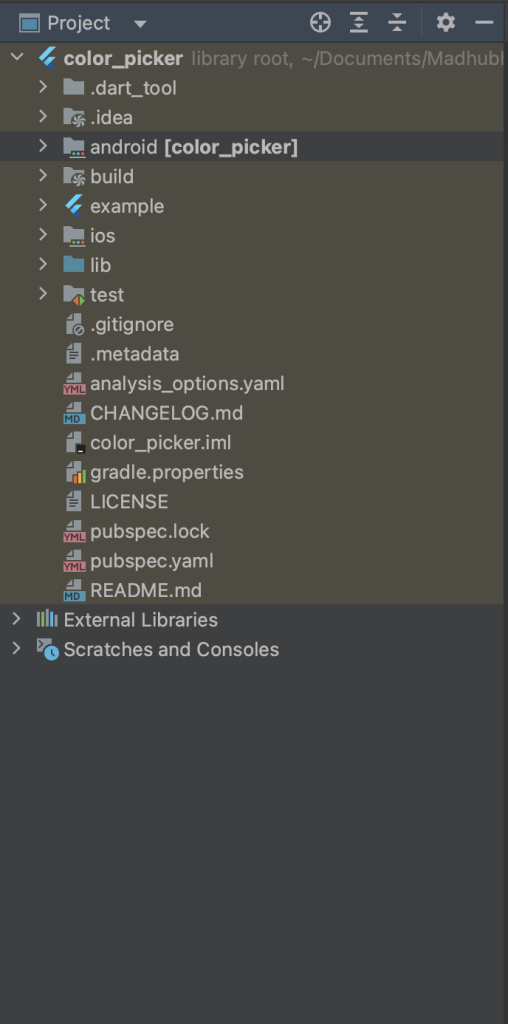
Once you run the command to create a Flutter plugin named “color_picker,” you’ll see the directory structure as per the screenshot.
This structure includes directories for Android and iOS platform code, a shared Dart code directory, an example directory, and various configuration and metadata files.
You’ll find platform-specific code files under android/ and ios/, while the shared Dart code resides in the lib/ directory.
The example/ directory contains an example Flutter app demonstrating how to use your plugin.
Here’s a breakdown of the Flutter plugin code structure for iOS:
ColorPickerPlugin.swift:
This file likely contains the implementation of the ColorPicker plugin for iOS using Swift. It may include methods to interact with native iOS APIs related to colour picking functionality.
public func handle(_ call: FlutterMethodCall, result: @escaping FlutterResult) {
       switch call.method {
        case "showColorPicker":
        showColorPicker(result: result)
    default:
        result(FlutterMethodNotImplemented)
      }
   }
This Swift function handles method calls from Flutter, executing showColorPicker when called with “showColorPicker”, and returns the result using FlutterResult, which can be either a success or a failure.
private func showColorPicker(result: @escaping FlutterResult) {
     guard let viewController =
      UIApplication.shared.keyWindow?.rootViewController
    else {
      result(FlutterError(code: "NO_VIEW_CONTROLLER", message: "Failed to find
      root view controller", details: nil))
      return
    }
    if #available(iOS 14.0, *) {
      colorPicker = UIColorPickerViewController()
      colorPicker.delegate = self
      resultCallback = { selectedColor in

 let red = CGFloat(selectedColor.cgColor.components?[0] ??0)
 let green = CGFloat(selectedColor.cgColor.components?[1] ?0)
 let blue = CGFloat(selectedColor.cgColor.components?[2] ??0)
 let alpha = CGFloat(selectedColor.cgColor.alpha)
 let flutterColor: [String: Any] = [
      "red": red,
      "green": green,
      "blue": blue,
      "alpha": alpha
    ]
      result(flutterColor)
    }
      viewController.present(colorPicker, animated: true, completion: nil)
    }else{
      result(FlutterError(code: "UNSUPPORTED_PLATFORM", message: "Color picker is not supported on iOS versions older than 14.0", details: nil))
    }
}
color_picker.dart:
This Dart file is probably the main entry point for the ColorPicker plugin on the Flutter side. It likely contains Dart code to define the public API of the plugin and to provide convenience methods for developers to use the plugin in their Flutter apps.
class ColorPicker {
       Future<Map<dynamic, dynamic>?> showColorPicker() {
          return ColorPickerPlatform.instance.showColorPicker();
     }
}
This Dart class, ColorPicker, defines a method showColorPicker() that returns a Future representing the result of invoking showColorPicker() from the platform-specific implementation provided by ColorPickerPlatform.instance.
color_picker_method_channel.dart:
This Dart file probably implements the communication between the Flutter app and the native iOS code using platform channels. It may define methods to handle method calls from Flutter to iOS and vice versa, ensuring smooth communication between the two platforms.
class MethodChannelColorPicker extends ColorPickerPlatform {
   /// The method channel used to interact with the native platform.
       @visibleForTesting
   final methodChannel = const MethodChannel('color_picker');
       @override
   Future<Map<dynamic, dynamic>?> showColorPicker() async {
       try {
   return await methodChannel.invokeMethod('showColorPicker');
       } on PlatformException catch (e) {
   log("Failed to pick color: '${e.message}'.");
       return null;
       }
   }
}
This Dart class, MethodChannelColorPicker, extends ColorPickerPlatform and uses a method channel named ‘color_picker’ to communicate with the native platform.
Its showColorPicker() method invokes the native method ‘showColorPicker’ through the method channel, handling any potential platform exceptions by logging an error message.
color_picker_platform_interface.dart:
This Dart file likely defines an interface that abstracts the platform-specific implementation details of the ColorPicker plugin. It helps in decoupling the Flutter code from the platform-specific implementations, making the plugin easier to maintain and allowing for platform-specific customizations if needed.
Future<Map<dynamic, dynamic>?> showColorPicker() {
    throw UnimplementedError('platformVersion() has not been implemented.');
}
This Dart method, showColorPicker(), returns a Future that throws an UnimplementedError with a message indicating that the method hasn’t been implemented yet.
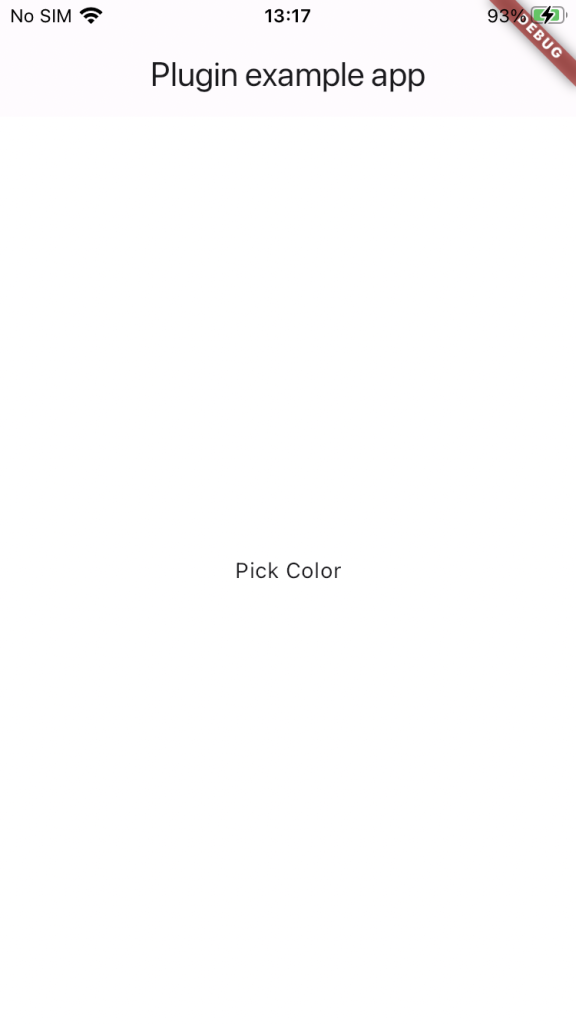
Here is the main.dart file where we use the plugin to select a color using a color picker.
class _MyAppState extends State<MyApp> {
final _colorPickerPlugin = ColorPicker();
@override
void initState() {
super.initState();
}
Color bgColor = Colors.white;
@override
Widget build(BuildContext context) {
return MaterialApp(
home: Scaffold(
backgroundColor: bgColor,
appBar: AppBar(
title: const Text('Plugin example app'),
),
body:Center(
child:InkWell(
onTap: () {
_colorPickerPlugin.showColorPicker().then((value) {
int scaleFactor = 255;
int red = (value?["red"]! * scaleFactor).toInt();
int green = (value?["green"]! * scaleFactor).toInt();
int blue = (value?["blue"]! * scaleFactor).toInt();
int alpha = (value?["alpha"]! * scaleFactor).toInt();
log("Red: $red, Green: $green, Blue: $blue, Alpha: $alpha");
setState(() {
bgColor = Color.fromARGB(255, red, green, blue);
});
});
},
child: const Text("Pick Color"),
),
),
),
);
}
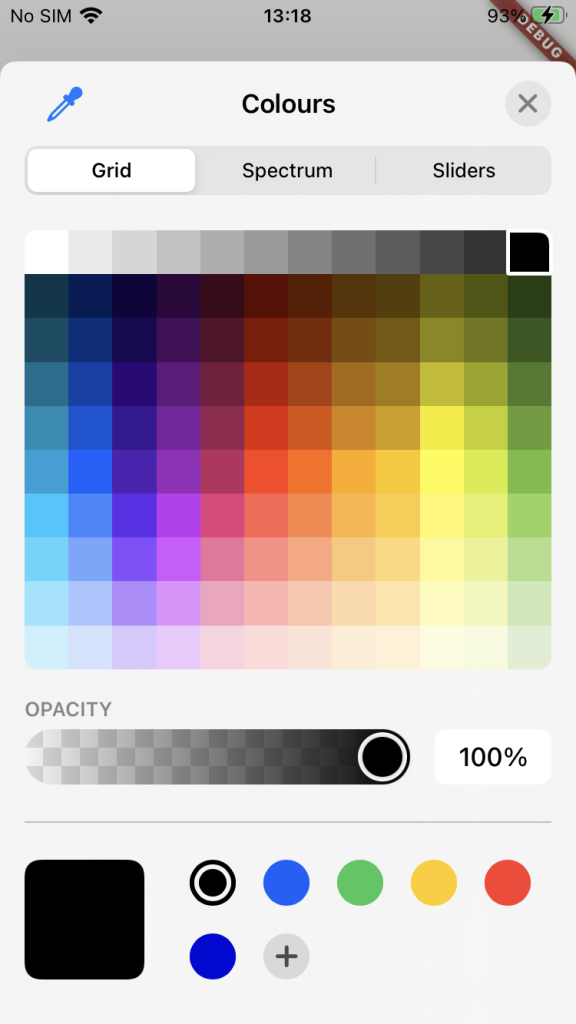
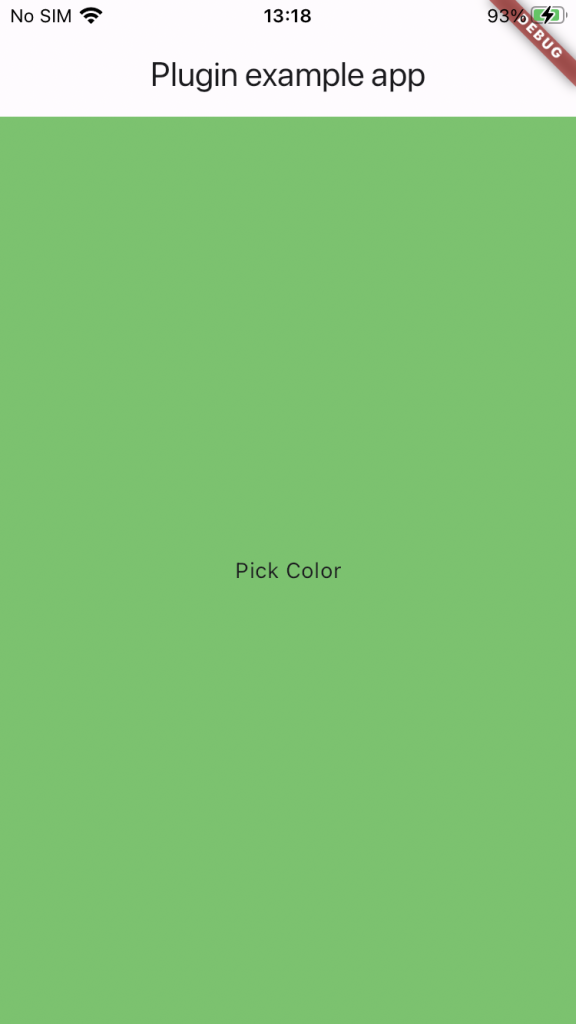
} Here you can see a screenshot example demonstrating how it is being utilized.
Conclusion:
In wrapping up our exploration, we’ve taken the first steps towards crafting a Flutter plugin named “color_picker.” By following along with the creation process, we’ve learned how to set up the project structure, delve into platform-specific code for Android and iOS, and develop shared Dart code for seamless integration.
In our next blog, we’ll focus on the Android example in our “color_picker” plugin and share how to publish it on pub.dev. Join us as we explore how the plugin works on Android, bringing colorful selection features to Flutter apps. Stay tuned for more updates!